Built-in shelving provides several practical and design benefits for residential spaces. The primary advantage is space efficiency. Unlike freestanding shelves that occupy floor area, built-in shelves integrate directly into the room’s structure, allowing homeowners to increase storage capacity without reducing usable living space.
Built-in bookshelves installed in alcoves or along unused wall sections convert otherwise wasted areas into functional storage. This approach is especially valuable in compact homes and apartments where space is limited. Beyond storage optimization, built-in shelving contributes to interior design cohesion.
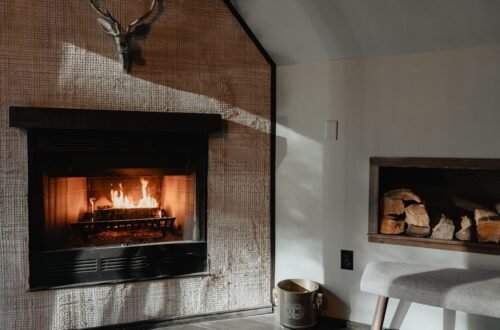
These shelves can be customized to coordinate with existing décor and architectural styles, from contemporary minimalist designs to traditional aesthetics. Built-in shelves can function as room focal points, displaying books, decorative objects, and collections in an organized arrangement. Integrated lighting systems further enhance their visual impact, creating displays that emphasize valued items and improve overall room ambiance.
Choosing the Right Location for Built-In Shelving
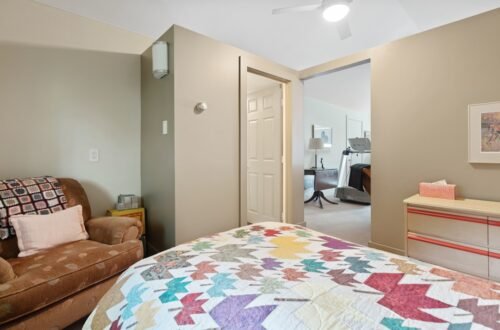
Selecting the ideal location for built-in shelving is crucial to maximizing its utility and visual impact. The first step is to assess the layout of the room and identify areas that could benefit from additional storage or display space. Common locations include living rooms, home offices, and bedrooms, where built-in shelves can house books, office supplies, or personal mementos.
It’s essential to consider the flow of the room; shelves should not obstruct pathways or create cluttered spaces. For example, placing shelves above a desk can provide easy access to frequently used items while keeping the workspace organized. Another important factor to consider is the height and depth of the shelving.
Built-in shelves should be positioned at a height that is comfortable for users, allowing for easy access to items stored on them. Additionally, the depth of the shelves should be appropriate for the items they will hold; deeper shelves may be necessary for larger books or decorative boxes, while shallower shelves may suffice for smaller items. Natural light is also a consideration; placing shelves near windows can enhance visibility and create an inviting atmosphere.
However, care should be taken to avoid direct sunlight on sensitive materials that may fade over time.
Types of Built-In Shelving
There are various types of built-in shelving that cater to different needs and preferences. One popular option is the traditional bookshelf, which can be designed with adjustable shelves to accommodate items of varying heights. This flexibility allows homeowners to customize their storage solutions based on their specific collections, whether it be novels, art books, or family photographs.
Additionally, traditional bookshelves can be styled with decorative elements such as molding or trim to enhance their visual appeal. Another type of built-in shelving is the corner shelf, which utilizes often-overlooked spaces in a room. Corner shelves can be particularly effective in maximizing storage in small areas while adding visual interest to the room’s design.
These shelves can be designed in various shapes and sizes, from simple triangular units to more elaborate configurations that wrap around the corner. Floating shelves are also gaining popularity; these minimalist designs are mounted directly onto walls without visible brackets, creating a sleek and modern look. Floating shelves can be used in various settings, from kitchens displaying spices and cookbooks to bathrooms showcasing decorative toiletries.
Tools and Materials Needed for Installation
Installing built-in shelving requires a specific set of tools and materials to ensure a successful project. Essential tools include a stud finder, which helps locate wall studs for secure mounting; a level, which ensures that shelves are installed evenly; and a drill with appropriate bits for making holes in the wall. A tape measure is crucial for accurate measurements, while a saw may be needed for cutting wood or other materials to size.
Additionally, having a hammer and nails or screws on hand will facilitate secure assembly. In terms of materials, plywood or MDF (medium-density fiberboard) is commonly used for constructing shelves due to their durability and ease of finishing. Wood veneer can also be applied for a polished look that mimics solid wood without the associated cost.
Brackets or shelf supports are necessary for providing stability and strength to the shelving unit. If lighting is being integrated into the design, LED strip lights or puck lights may also be required. Finally, paint or stain will be needed to finish the shelves and ensure they blend seamlessly with the room’s decor.
Step-by-Step Guide to Installing Built-In Shelving
| Metric | Value | Notes |
|---|---|---|
| Average Time to Build | 4-6 hours | Depends on shelf size and complexity |
| Weight Capacity per Shelf | 20-50 lbs | Varies with materials and mounting method |
| Common Materials Used | Wood, MDF, Metal Brackets | Choose lightweight materials to avoid wall damage |
| Mounting Method | Adhesive Strips, Tension Rods, Freestanding Units | Non-invasive options to prevent wall damage |
| Estimated Cost | 30-100 | Material dependent, excludes tools |
| Wall Types Suitable | Drywall, Plaster, Brick (with care) | Non-invasive methods preferred for delicate walls |
| Tools Required | Level, Measuring Tape, Adhesive Applicator | Minimal tools needed for non-damaging installation |
| Durability | 1-5 years | Depends on usage and mounting method |
The installation process for built-in shelving involves several key steps that require careful planning and execution. First, it’s essential to measure the designated area accurately and mark where the shelves will be installed. Using a stud finder, locate the wall studs and mark their positions; this will provide secure points for anchoring the shelves.
Next, cut the wood or MDF panels to size according to your measurements, ensuring that they fit snugly within the designated space. Once the panels are cut, it’s time to assemble the shelving unit. Begin by attaching any necessary brackets or supports to the wall at the marked stud locations using screws.
Ensure that these supports are level before proceeding. After securing the supports, place the cut panels onto them and check for levelness again. If everything is aligned correctly, secure the panels in place using screws or nails as needed.
If you’re incorporating lighting into your design, this is also the time to install any electrical components before finishing touches are applied.
Tips for Customizing Built-In Shelving

Customization is one of the most appealing aspects of built-in shelving, allowing homeowners to create unique storage solutions tailored to their specific needs. One effective way to personalize built-in shelves is through color and finish selection. Choosing paint or stain that complements existing furniture or wall colors can create a harmonious look throughout the room.
For instance, a bright white finish can lend a fresh and airy feel to a small space, while darker stains can add warmth and richness. In addition to color choices, incorporating decorative elements can further enhance built-in shelving. Adding crown molding or trim around the edges of shelves can create a polished look that elevates the overall design.
Furthermore, integrating adjustable shelving allows for flexibility in displaying items of varying sizes; this adaptability can be particularly useful in spaces where collections may change over time. Finally, consider incorporating lighting features such as LED strips or spotlights that highlight specific items on display while adding ambiance to the room.
Maintenance and Care for Built-In Shelving
Maintaining built-in shelving is essential for preserving its appearance and functionality over time. Regular dusting is crucial; using a microfiber cloth or duster can help remove dust buildup without scratching surfaces. For wooden shelves, it’s advisable to use a gentle wood cleaner periodically to maintain their finish and prevent wear from moisture or grime.
If painted surfaces begin to show signs of wear or chipping, touch-up paint can be applied to keep them looking fresh. In addition to surface care, it’s important to periodically assess the structural integrity of built-in shelving. Check for any signs of sagging or instability, especially if heavy items are stored on the shelves.
Reinforcing brackets or adding additional supports may be necessary if any issues arise. Furthermore, if lighting has been integrated into the design, ensure that bulbs are functioning properly and replace them as needed to maintain optimal illumination.
Troubleshooting Common Issues with Built-In Shelving Installation
Even with careful planning and execution, issues may arise during the installation of built-in shelving that require troubleshooting. One common problem is misalignment; if shelves appear uneven after installation, it may be necessary to adjust brackets or supports accordingly. Using a level during installation can help prevent this issue from occurring in the first place; however, if adjustments are needed post-installation, carefully loosening screws and repositioning supports can often resolve misalignment.
Another potential issue is inadequate weight support; if shelves sag under heavy loads, it may indicate that they were not anchored securely enough or that they require additional support brackets. In such cases, reinforcing existing supports or redistributing weight across multiple shelves can alleviate stress on individual units. Additionally, if there are concerns about stability due to wall conditions—such as drywall that may not support heavy loads—considering alternative mounting methods or consulting with a professional may be prudent steps toward ensuring long-lasting functionality and safety in your built-in shelving project.
FAQs
What are built-in shelves?
Built-in shelves are storage units that are integrated into the structure of a room, typically recessed into walls or fitted seamlessly against them, providing a permanent and space-saving solution for organizing items.
How can I build built-in shelving without damaging walls?
You can build built-in shelving without damaging walls by using freestanding units that fit snugly into wall recesses, employing tension rods or brackets that do not require drilling, or attaching shelves to existing studs with minimal hardware. Using adhesive strips or removable mounting systems can also help avoid wall damage.
What tools are needed to build built-in shelving?
Common tools for building built-in shelving include a measuring tape, level, stud finder, drill, screwdriver, saw (if cutting wood), sanding tools, and appropriate hardware such as brackets or mounting strips. The exact tools depend on the shelving design and installation method.
Can built-in shelves be installed in rental properties?
Yes, built-in shelves can be installed in rental properties if done without causing permanent damage to walls. Using non-invasive mounting methods like tension rods, adhesive hooks, or freestanding units is recommended to comply with rental agreements.
What materials are best for building built-in shelves?
Materials commonly used for built-in shelves include wood (such as plywood, MDF, or hardwood), metal brackets, and sometimes glass for shelves. The choice depends on the desired aesthetic, weight capacity, and ease of installation without damaging walls.
How do I ensure built-in shelves are level and secure?
To ensure shelves are level and secure, use a level during installation, locate wall studs with a stud finder for anchoring if possible, and use appropriate hardware rated for the shelf’s weight. For non-invasive methods, ensure tension rods or brackets are tightly fitted and stable.
Are there alternatives to built-in shelving that do not damage walls?
Yes, alternatives include freestanding bookcases, leaning ladder shelves, modular storage units, and tension pole shelving systems. These options provide storage without requiring wall attachment or causing damage.
How much weight can built-in shelves hold without wall damage?
The weight capacity depends on the installation method and materials used. Shelves mounted without drilling typically hold less weight, often up to 20-30 pounds per shelf, while shelves anchored into studs can support significantly more. Always check hardware specifications and avoid overloading.
Is professional installation recommended for built-in shelving?
Professional installation is recommended if you want a permanent, secure built-in shelving solution, especially when wall modifications are involved. For non-invasive or temporary shelving, DIY installation is often feasible with proper tools and instructions.
Can built-in shelving increase home value?
Yes, well-designed and properly installed built-in shelving can enhance a home’s aesthetic appeal and functionality, potentially increasing its market value by providing attractive and efficient storage solutions.